Surgical Selection
Attempting to edit your image into absolute perfection solely using global adjustments is a recipe for disappointment. You need that fine-tooth comb to really give your image the minute detail editing it deserves. White balance and exposure lay out a solid foundation to stand on, but the real soul of your image hides in the shadows, the highlights, objects in the background and the clothing of your subject Masking has absolutley evloved from the stone age of painting onto your subject, to intricate neural networks that can scan your image for the smallest of details, banging out the grunt work for you, thus speeding up your workflow.
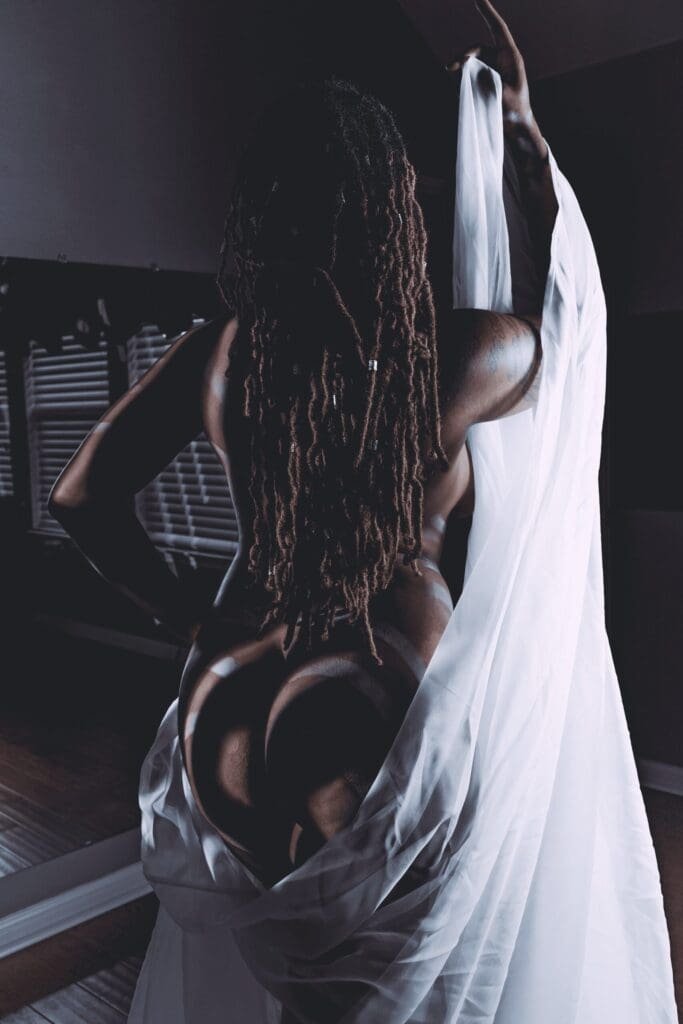
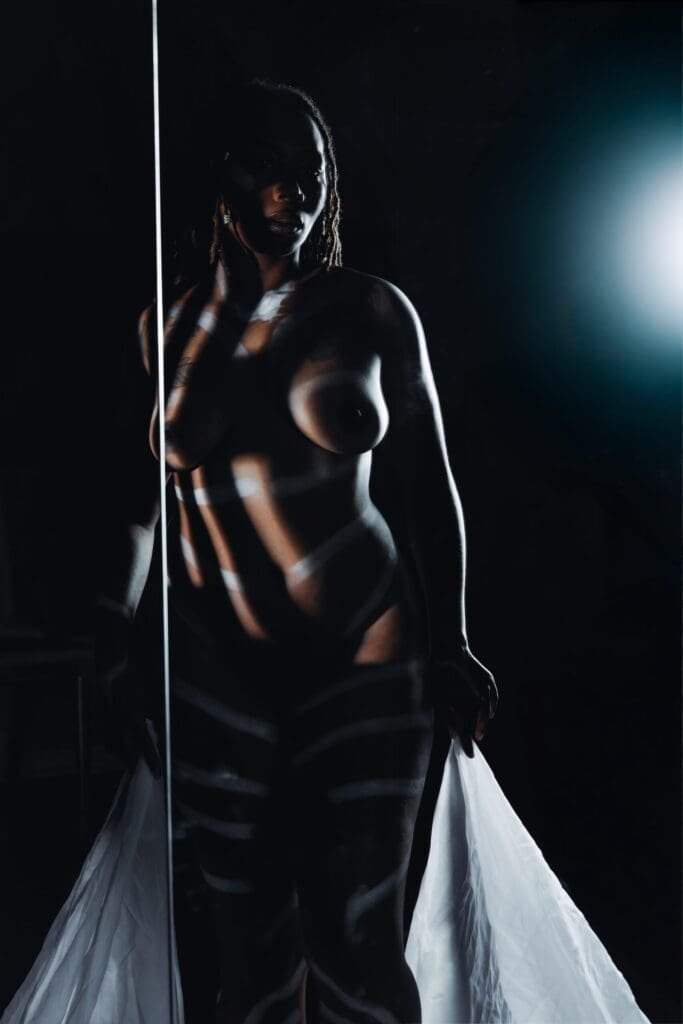
Masking is the scalpel in a digital artist’s hand. It lets you carve your subject from the chaos, heal skin without disturbing the scars that give it character, and bend light to your will. If you want to shape your story, you have to master these tools and make every adjustment count.
From Brushes to Neural Recognition
“Back in my day” (insert grandpa voice here), it would take hours to properly mask an image. Dragging brushes across the canvas, hoping the edges would stick. Hair, strands of fabric, fingers, would all slip through the cracks, giving a brand new meaning to “rough around the edges”. The tools had their purpose and did their job, but not at a cost. Precision was a luxury.
Then the Masking Engine arrived and rewrote the rules. Now, AI hunts down the subject, sky, or background with a single command. It doesn’t just pick colors—it reads the image, traces the bones and veins, and locks onto shapes with a precision that borders on obsession.
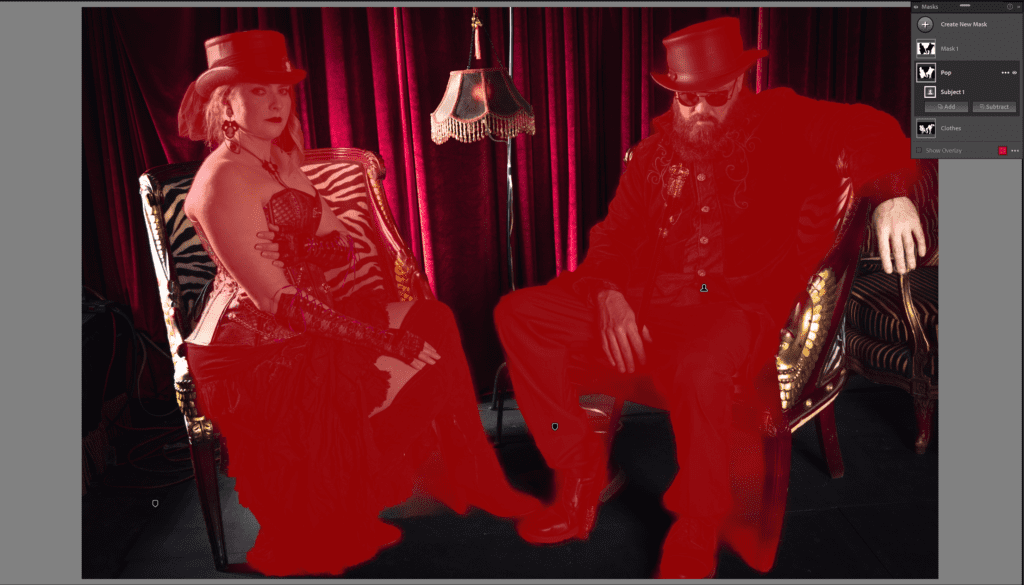
The Mechanics of Intersecting Masks
The real strength of modern masking is in the mix. You grab the sky, then bleed it with a gradient, letting the effect fade like dusk falling over a city. Layer by layer, you build your vision—half strategy, half instinct.
“Intersecting masks move the workflow from ‘painting’ to ‘defining.’ By using Range Masks, (specifically Color and Luminance ranges) the artist can target only the darkest shadows inside a specific subject’s hair or only the muted blues within a piece of atmospheric fog.”
This level of control was what we were all praying for, creating sharp precision and expanding the possibilities in your edits. Your details hold true, allowing you to tell the story you truly intended.
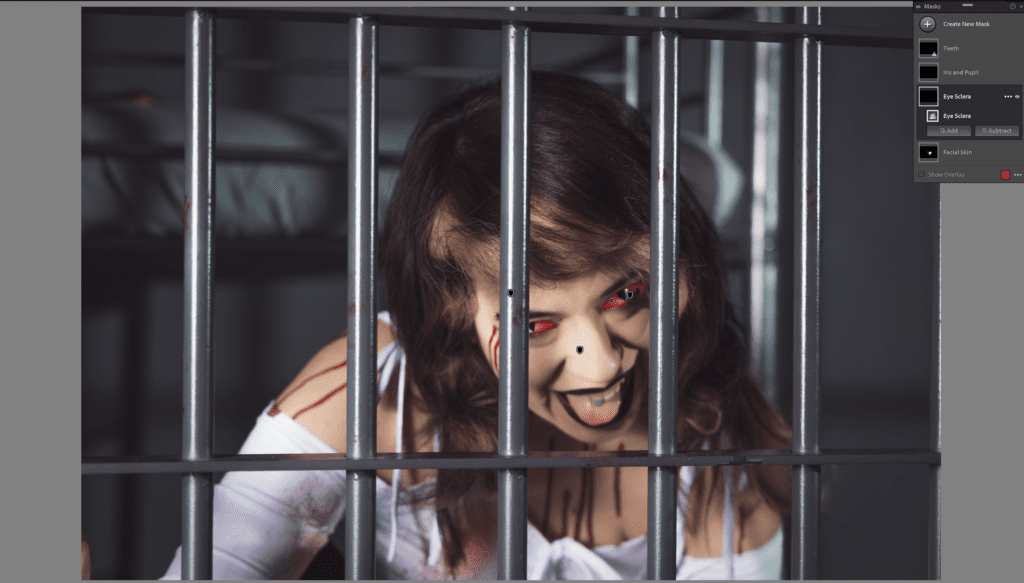
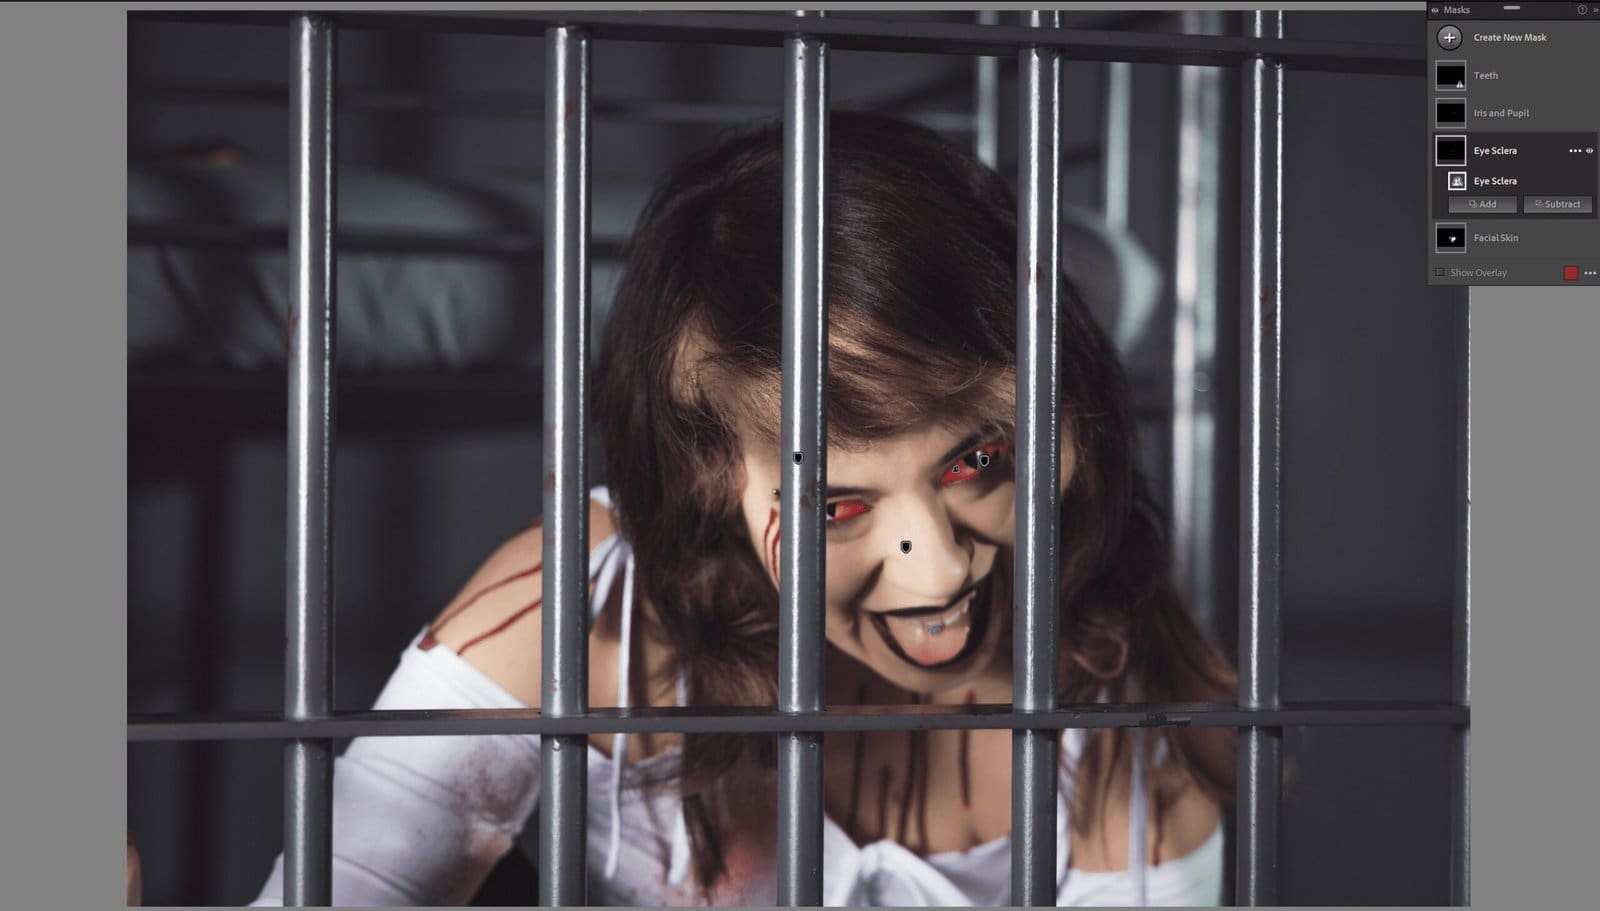
People Masking and Component Isolation
With the latest updates, masking actually sees people, recognizes characters, and breaks the subject down to a granular level. You can even zero in on the iris and sclera, spark up the catchlight in someone’s eyes, and fake studio lighting without tipping your hand. The best edits are the ones nobody notices; subtle, careful, almost invisible.
Adaptive Presets and Work Process Efficiency
AI is everywhere; it’s impossible to miss, and that technology has absolutely bled into masking as well. With AI adaptive presets, you can automatically mask off the different layers of your image, speeding up your workflow even further. There are even complete packages with presets preinstalled that can completely change the look and feel of your image with just a few quick clicks (though I’m not sure I would recommend them).
As we wrap this up, I highly encourage you to play around with masking. When I first started on my journey, it was something I originally neglected, but after I finally zeroed in on the concept (which, honestly, doesn’t take long), it reshaped my approach to editing. It’s amazing how much a difference even a simple background and subject mask can make.
Happy editing!
RECALIBRATE YOUR EDITING
Local adjustments are just the heartbeat of your story. If you really want to own your narrative, dig into these techniques and let your images speak for themselves.